
In the sprawling galaxy of Star Wars Outlaws, Kay Vess relies on her wits, her speeder, and most importantly, her trusty blaster. While picking up shiny new gear is a piece of cake early on, giving her sidearm some serious bite requires a bit of elbow grease. As of 2026, the upgrade system introduced at launch remains the gold standard for turning Kay into a true gunslinger. Knowing how to navigate the Trailblazer’s workbench and gather the right components can mean the difference between a scrappy scoundrel and a legendary outlaw.
Prerequisites: Unlocking the Workbench
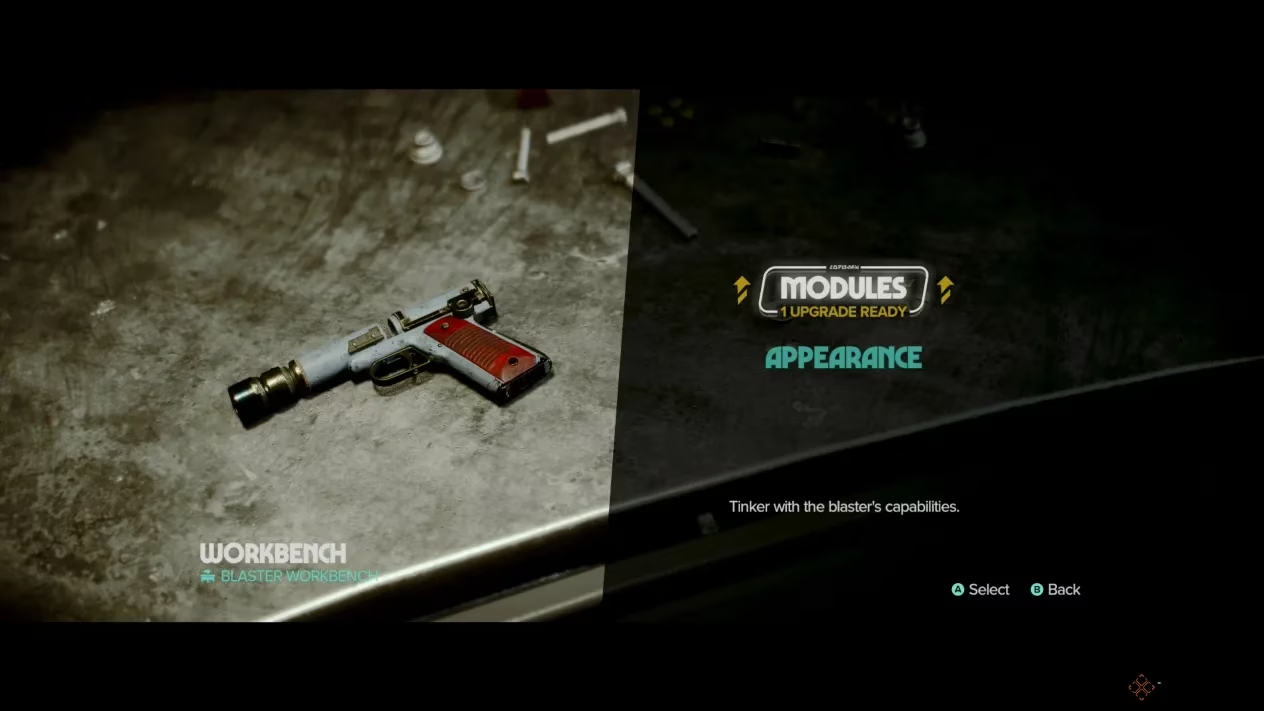
Before tinkering with the blaster, players must complete the main quest “New Tricks.” This mission has Waka repair the Trailblazer, which then serves as a mobile base of operations. Once the ship is up and running, players can freely walk around its interior. The blaster workbench sits in the western wing of the ship, a compact station that holds the key to firepower. However, merely walking up to it isn’t enough; each upgrade demands specific materials, and more advanced tweaks often require rare schematics. It’s not just about having credits to burn—the right components must be scavenged from the far corners of the galaxy.
Note that cosmetic changes to the blaster’s appearance, while also a form of customization, are handled separately. Players unlock cool skins through faction milestones, side quests, and other achievements, but that’s a different kettle of fish. This guide focuses solely on the functional upgrades that make a blaster hit harder, shoot straighter, and cool down faster.
Diving Into the Upgrade Menu

When close to the workbench, pressing the right analog stick (or the equivalent button on the platform) opens the customization interface. Two tabs appear: Modules and Appearance. Navigating to the Modules tab reveals the heart of the upgrade system. Here, players find three primary module categories:
-
Plasma Module – The standard bread-and-butter firing mode, boosting raw damage and consistency.
-
Ion Module – Designed to fry shields and droids, turning high-tech enemies into scrap metal.
-
Power Module – A charged shot that packs a wallop, capable of blasting through cracked rocks and staggering even the toughest foes.
Initially, not all modules are available. The Power Module, for instance, won’t show its face until later in the story. Within each category, sub-upgrades can be applied, such as improved cooling efficiency, tighter spread, or the ability to switch firing types on the fly. It’s a system that rewards patience and exploration, a classic RPG loop that keeps players scouring every corner of the Outer Rim.
Scrounging for Resources: The Best Methods
Materials don’t grow on trees—even on Kashyyyk. To keep the blaster in tip-top shape, players need a steady supply of components. One of the most reliable methods is tackling Contracts. These side jobs, offered by various fixers, often reward upgrade materials right off the bat. The grind can feel like a second job at times, but the payout is well worth the sweat.
For those looking to hit the motherlode, cozying up to the Hutt Cartel and Ashiga Clan factions is a no-brainer. Reaching “Excellent” reputation status with either group unlocks Blaster Part Bundles, which contain a treasure trove of valuable resources. It’s a classic case of “you scratch my back, I’ll scratch yours”—by running missions for these outfits, players earn the parts needed to become a force to be reckoned with.
Additionally, every major planet hosts an Armorer who sells blaster upgrade materials. If a player’s reputation with the local faction is high enough, the Armorer might offer unique items and even generous discounts. Picking fights with a faction just because someone looked at you funny might come back to bite you when you’re staring at a critical upgrade you can’t afford. Keeping a clean-ish reputation across multiple syndicates is a savvy move.
Tracking Down Specific Schematics and Rare Materials
Some upgrades aren’t available through simple scavenging or faction rewards. They are tied to specific questlines. The most notable example is the Power Module, which is unlocked by completing the “Gunsmith” main quest. This quest becomes available after finishing “The Wreck.” The Power Module is a game-changer, allowing Kay to charge a devastating shot that not only decimates enemy health bars but also demolishes fragile rock barriers, opening new paths and secret stashes. Many players consider it a must-have as soon as possible, and it’s easy to see why.
For other rare components, the in-game interface provides a handy shortcut. By hovering over a desired upgrade and pressing the Y button (or Triangle on PlayStation controllers), players can bring up the “Requirement Details.” This screen spells out exactly where and how to obtain each needed material. If that’s not enough, pressing the same button again pins the location on the map, turning the procurement process from a wild Bantha chase into a straightforward fetch quest. It’s a small quality-of-life feature that saves a boatload of time.
Putting It All Together
Upgrading Kay’s blaster in Star Wars Outlaws is more than a stat boost—it’s a rite of passage. From the moment players first step into the Trailblazer’s workbench to the final, fully kitted-out module suite, the journey is packed with tense firefights, reputation management, and the occasional lucky find in a Jawa’s junk pile. Focusing on the Power Module early on can flip the script in tough encounters, while maintaining good standing with the Hutts and Ashiga ensures a steady flow of high-grade components. By 2026, the community has ironed out the most efficient routes, but the thrill of turning a humble blaster into a customized killing machine remains as fresh as ever. Just remember: in the criminal underworld, a well-tuned blaster is worth its weight in beskar.