
In the vast, lawless expanse of the galaxy, information is a currency as valuable as credits themselves. For the scoundrels and smugglers navigating the gritty underworld of Star Wars Outlaws, a lead on a high-value intel chain can mean the difference between a big score and a blaster bolt to the back. The Repulsor Train quest, a mission centered on recovering a series of lost datapads codenamed the 'Miner's Diary,' presents exactly such an opportunity. But as any seasoned outlaw knows, the best opportunities are rarely handed out with a map and a friendly wave. So, where does one even begin such a hunt, and what treasures—both monetary and influential—await at the end of the trail?

Initiating the Quest: A Chat with the Pykes
First things first, the Repulsor Train quest won't magically appear in your journal. This is a mission that requires a personal touch, or more accurately, a discreet conversation with the right underworld figures. To get the ball rolling, players must travel to the iconic spaceport of Mos Eisley on Tatooine. Upon entering the bustling settlement, head to the first shop on the right. Inside, you'll find technicians affiliated with the powerful and dangerous Pyke Syndicate. A brief dialogue with these syndicate members will point you toward an Engineer in the nearby settlement of Bestine. This Engineer, found lounging on a wrecked speeder, is the key. Speaking with him officially triggers the Repulsor Train mission and directs your attention to the mining outpost of Mos Algo, where all the action takes place.
The Hunt Begins: Locating the Miner's Diary Datapads
The objective is clear: recover three specific datapads scattered around Mos Algo. Their locations are not marked, turning the quest into a scavenger hunt that rewards exploration and a keen eye. All three items are found within the same general area, making for a efficient, if challenging, collection run.
📍 Datapad #1: "Day 1" - The Abandoned House
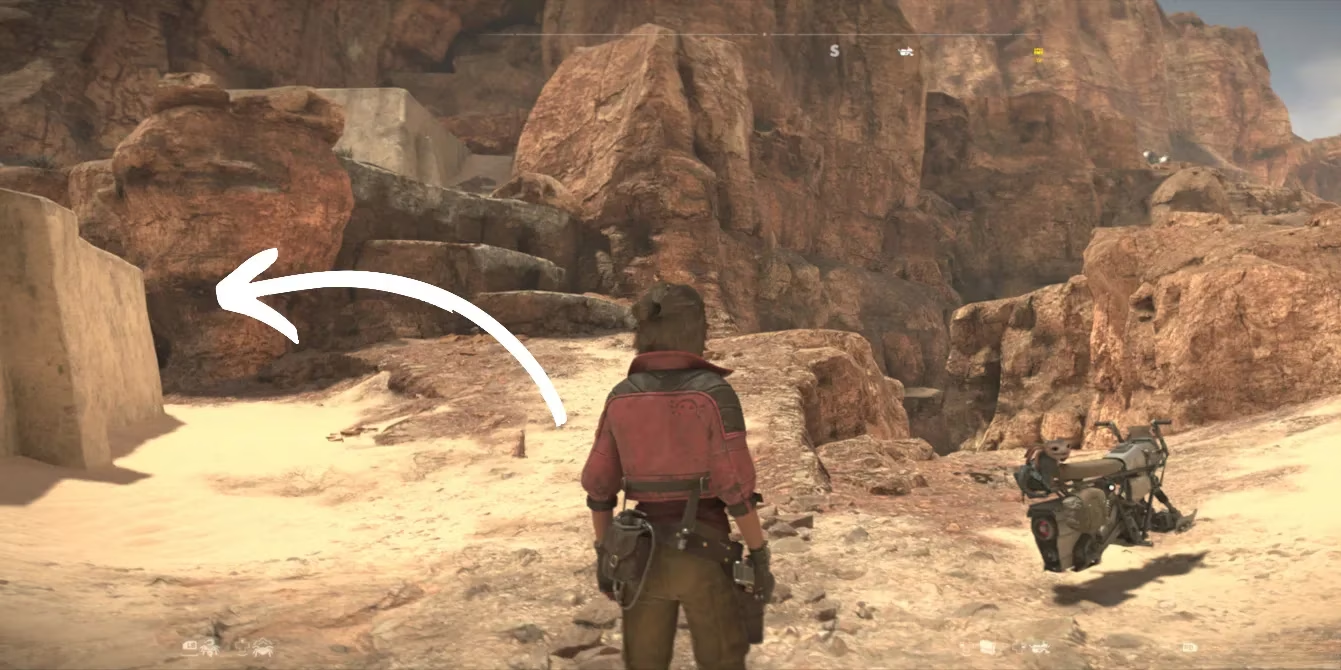
The first datapad is arguably the easiest to find and serves as a good introduction to the area. From the Mos Algo landing zone, head down toward the mining settlement. Almost immediately, look for an abandoned house on your left. Venturing inside this derelict dwelling will quickly reveal the first datapad, labeled "Day 1." This entry likely contains the miner's initial observations, setting the stage for the story contained within the subsequent logs.
🔑 Datapad #2: "Day 92" - The Locked Supply Room
The second datapad introduces a layer of puzzle-solving. It is secured inside a Supply Room that requires a keycard. Here’s the step-by-step process to claim it:
-
Find the Keycard: Near the entrance to the main mining settlement, and directly behind the house where you found the first datapad, locate a small building with a generator outside. A few well-placed ion shots to the generator will unlock the door, allowing you to grab the Mine Supply Room Keycard from inside.
-
Navigate to the Mine: Make your way to the abandoned mine entrance at the far end of the Mos Algo settlement. Squeeze through the rocky entrance.
-
Take a Secret Path: Once inside the mine, immediately take the first left, looking for a gap in the wall. This leads to a hidden pathway.
-
Restore Power and Unlock: Follow this path until you reach a locked gate. To open it, you must restore power. In the adjacent room, use your trusty companion Nix to open a shutter covering a power supplier, then shoot the generator inside to activate it. With power restored, use your newly acquired keycard on the gate's console.
-
Claim the Prize: Inside the Supply Room, you'll find the second datapad: "Day 92."
⛏️ Datapad #3: "Day 140" - The Lost Sandcrawler
The final datapad is hidden in the most remote and treacherous part of the mine, an area known as the Lost Sandcrawler. Reaching it requires parkour skills and sharp shooting.
-
Find the Alternate Path: From the mine entrance, this time do not turn left toward the Supply Room path. Instead, continue straight down the main hallway.
-
Break Through: You will eventually encounter a cracked wall sealed by breakable rocks. Destroy these rocks to reveal a new passage.
-
Traverse the Terrain: This area is a parkour challenge. Navigate the environment until you pass two consecutive grappling hook sections, which will bring you to an abandoned facility.
-
Solve the Final Puzzle: Here, you'll face one last obstacle. Look for a generator visible through a gap in a wall. Shoot it to activate a mechanism, then command Nix to pull a nearby lever. This action will unlock the final door.
-
Complete the Set: Inside this secured room rests the last datapad, "Day 140," concluding the miner's recorded saga and your primary objective.
The Rewards: More Than Just Credits
Completing the Repulsor Train quest is a succinct but worthwhile endeavor. Upon returning the datapads, players are rewarded with:
-
💰 500 Credits: A solid payout for a relatively short mission, providing essential funds for ship upgrades, new gear, or paying off a pesky bounty.
-
🤝 Pyke Syndicate Reputation: Perhaps even more valuable than the credits are the reputation points earned with the Pyke Syndicate. In the underworld of Star Wars Outlaws, reputation is everything. Improving your standing with a major faction like the Pykes can unlock exclusive missions, better prices from vendors, and crucial allies in the galaxy's shadowy corners.
In summary, the Repulsor Train quest perfectly encapsulates the Star Wars Outlaws experience: a journey that begins with a shady conversation, unfolds through exploration and environmental puzzle-solving, and concludes with rewards that bolster both your wallet and your galactic influence. It's a reminder that in 2026, the life of an outlaw is about connecting dots—and sometimes, those dots are hidden in abandoned mines and locked supply rooms on the dunes of Tatooine.